Protect the original before changing it
Copy the files to organised storage and make an independent backup before formatting the memory card. A folder name that combines the date and a broad location is often enough to find a session again. Keep original RAW files when available, and preserve the edit instructions or project files needed to reproduce the result. A finished JPEG is not a substitute for the source material.
Begin selection at a sensible viewing size. Look for a clear arrangement and convincing light before comparing tiny differences in sharpness. Reject obvious technical failures, then inspect the strongest candidates more closely. Several almost identical frames can make editing feel productive without improving the final photograph. Choose the one whose relationships are most coherent, not merely the one with the brightest sky.
Establish the overall balance
Apply appropriate lens corrections, check the horizon and consider a modest crop. Corrections can stretch edges or reveal empty corners, particularly with wide lenses and stitched images, so inspect the result instead of accepting it automatically. Avoid levelling by a sloping mountain ridge; use a reliable reference when one exists, and make a considered visual judgement when it does not.
Set overall exposure so the main subject sits naturally in the scene. Recover bright cloud only where useful detail exists, and lift shadows only enough to explain their role. A dark valley under a sunlit summit is not necessarily a defect. Forcing all parts of the photograph toward equal brightness can remove the very depth and timing you travelled to observe.
Let colour remain specific to the light
White balance is an interpretation, but it should still make visual sense. A shaded slope and a sunlit ridge need not share the same warmth. Start with a plausible overall balance, then compare rock, snow and vegetation rather than relying on a single supposedly neutral patch. Deep shade can retain a cooler appearance without needing to be made grey.
Use saturation and vibrance sparingly. If greens become luminous or the warm ridge turns uniformly orange, the adjustment may be concealing natural variation. Check individual colour channels when a bright area loses texture. Step away from the screen and return; your eyes adapt quickly to progressively stronger edits, making restraint harder to judge during a long session.
Compare a decision, not a promise
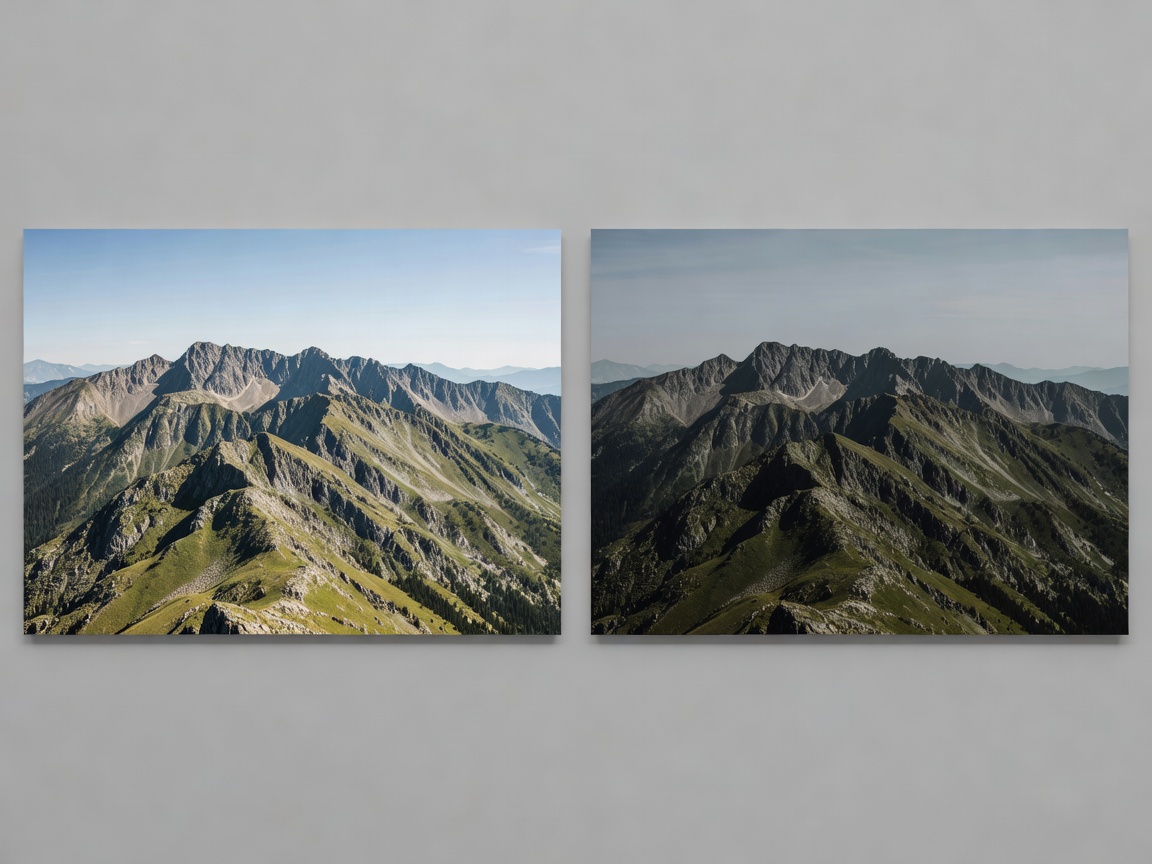
Teaching comparison: both panels use the same photograph. The first has a display-only brightness and saturation adjustment; this is not a documented RAW development or a claim of recovered detail.
When assessing your own before and after, ask what became easier to read. A successful adjustment might separate two ridges or bring attention back to a small band of light. It does not have to make the whole picture brighter. If an edit draws attention to itself before the landscape, reduce it and compare again.
Use local adjustments with a clear purpose
Local masks can gently guide attention, but the transition matters as much as the effect. Watch for bright halos along summits, dark outlines around trees and abrupt changes in cloud. Strong clarity or dehaze adjustments can make distant layers look unnaturally solid. Atmospheric softness is useful information about scale; keep it unless you have a specific reason to change it.
For exposure blends, check moving grass, water and cloud at the boundaries. For focus stacks, inspect detailed foreground edges and gaps between objects. For panoramas, follow the entire horizon and examine repeated rocks, broken lines and inconsistent texture. Automated tools can produce a plausible small preview while leaving obvious faults at larger sizes. Keep an unmerged source sequence available.
Finish for the way the image will be seen
Apply noise reduction and sharpening with the intended output in mind. Inspect fine detail without assuming every photograph must look equally crisp at maximum magnification. Export a separate delivery file, usually in sRGB for general web sharing, while retaining the original working material. Resize and assess output sharpening at the final dimensions rather than guessing from the full-resolution master.
Remove private location metadata when sharing a sensitive site. Explain substantial changes when they affect how viewers understand the scene: a combined exposure, replaced sky or removed major feature should not be presented as an untouched documentary moment. Creative work has room for invention, but honest labelling preserves trust. Finish when the image communicates clearly, not when every available slider has been used.